This article contains the steps to configure the Project Server 2013 Service Application and Project Web App site.
Click Here to view the Installation steps for Project Server 2013
Launch the SharePoint Central Administration page
Under Service Application, Click on Manage Service Application
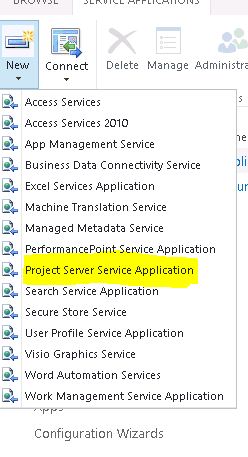
Click on New from the Ribbon Bar, You'll see Project Server Service Application three
Clcik on Project Server Service Application

Enter the Project Services Application Name
Select Create new application pool and give a name to it
Select the defined project server service account
Select the Proxy
Click Ok
Note: There is a timer job called Project Server Provisioning which will run in the background to provision the Service Application
Click on Create Project Web App Instance
Select the Web Application where you want to provision the Project Web App Instance
Give a Project Web App Path
Specify Administrator Account for managing the Project Web App Instance
Specify the Database Server and Database Name
Specify the Quoata Limit if you have any policies around the same.
Also, restrict the Content Database so no other site collections get created in Project Database
by chaning the Minimum and Mixumum Site collection creation valua to 0 and 1 respectively.
Note: In this scenerio I've not installed Analysis Service for creating OLAP cubes , this can be done afterwards for reporting purpose
It starts the process, firstly does Creating project Web App Site
Then Provisions the Database
Configures the new Project Web App Site
Finally, it's provisioned.
This is how it looks
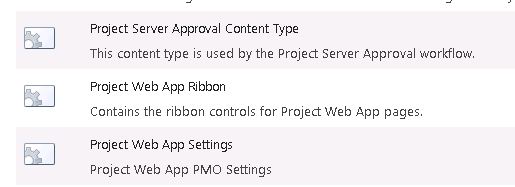
The following Site Collection features are activated on Project Web App site collection.
These are the Site Features which I've manually actiavted
This one is interesting, Project Server 2013 creates only one Database unlike Project Server 2010 which creates 4 Databases huge improvement.
I would suggest to seggregate Analysis Service on to a dedicated server if you want to leverage the OLAP Cubes for reporting purposes. I haven't yet tried that but will do in mere future.
Thanks for reading this post and I hope it was helpful.
Click Here to view the Installation steps for Project Server 2013
Launch the SharePoint Central Administration page
Under Service Application, Click on Manage Service Application
Click on New from the Ribbon Bar, You'll see Project Server Service Application three
Clcik on Project Server Service Application

Enter the Project Services Application Name
Select Create new application pool and give a name to it
Select the defined project server service account
Select the Proxy
Click Ok
Note: There is a timer job called Project Server Provisioning which will run in the background to provision the Service Application
Select the Web Application where you want to provision the Project Web App Instance
Give a Project Web App Path
Specify Administrator Account for managing the Project Web App Instance
Specify the Database Server and Database Name
Specify the Quoata Limit if you have any policies around the same.
Also, restrict the Content Database so no other site collections get created in Project Database
by chaning the Minimum and Mixumum Site collection creation valua to 0 and 1 respectively.
Note: In this scenerio I've not installed Analysis Service for creating OLAP cubes , this can be done afterwards for reporting purpose
It starts the process, firstly does Creating project Web App Site
Then Provisions the Database
Configures the new Project Web App Site
Finally, it's provisioned.
This is how it looks
The following Site Collection features are activated on Project Web App site collection.

These are the Site Features which I've manually actiavted
This one is interesting, Project Server 2013 creates only one Database unlike Project Server 2010 which creates 4 Databases huge improvement.
I would suggest to seggregate Analysis Service on to a dedicated server if you want to leverage the OLAP Cubes for reporting purposes. I haven't yet tried that but will do in mere future.
Thanks for reading this post and I hope it was helpful.


No comments:
Post a Comment